Category: Electric Transfer Chair
Posted by 2025-12-29 11:12
hoyer lift guide
Hoyer Lift Guide: A Complete User Manual from Beginner to Pro
The Hoyer Lift is an indispensable assistive device in modern caregiving. It is widely used to help individuals with limited mobility complete daily transfers, such as from bed to wheelchair, floor to toilet, and bathtub to care bed. Not only does it significantly reduce the physical burden on caregivers, but it also effectively prevents falls, skin injuries, and secondary harm, making every transfer safer, smoother, and more dignified.
However, even the most advanced equipment can pose risks if used improperly. This guide is specifically written for family caregivers, elderly care staff, and rehabilitation-related personnel. In a clear and practical manner, it will take you from understanding the equipment to mastering its operation, helping you fully grasp the key points for the safe use of the Hoyer Lift.
I. Get to Know Your Hoyer Lift
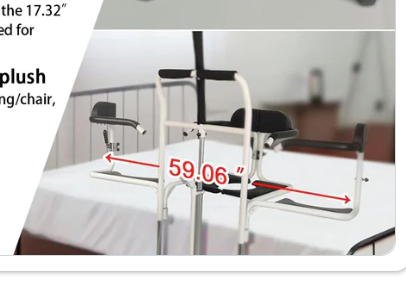
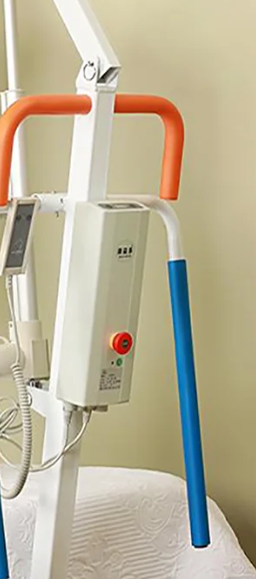
1. Basic Components
A typical Hoyer Lift usually consists of the following parts:
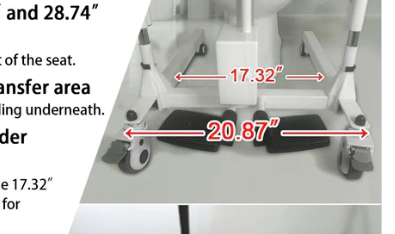
Base and Legs: Provide stability; most can be expanded or folded.
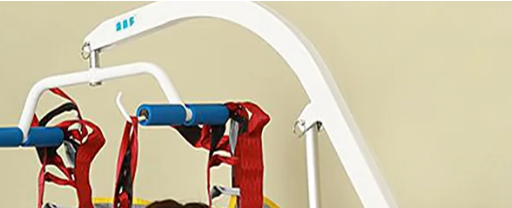
Column and Boom: Support and move the user.
Lifting System: An electric linear actuator or hydraulic pump, responsible for vertical lifting.
Control Handle: Used to start/stop lifting and rotation (for some models).
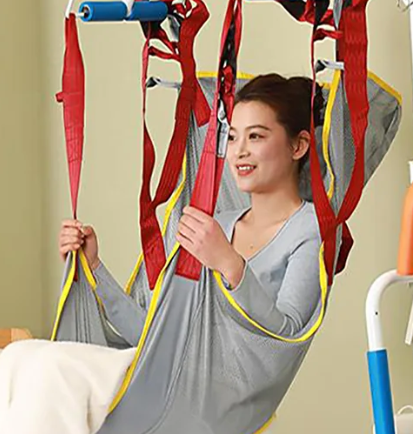
Sling: The key component that directly supports the user’s body.
2. Common Types
Manual Hydraulic: Lifted by repeatedly pressing a handle, hoyer lift guide suitable for low-frequency use.
Semi-Electric: Electric lifting + manual base adjustment.
Full Electric: All functions (lifting, rotation, base expansion) are electrically controlled, making operation the most labor-saving.
Tip: For high-frequency home use, a full-electric model is recommended. If on a budget, a manual model can be chosen, but attention should be paid to physical exertion.
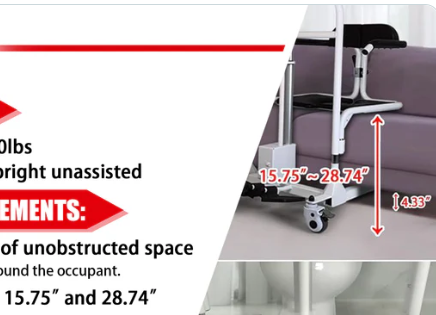
II. Five Pre-Use Checks
Before each operation, be sure to complete the following checks—this is the first line of defense for safe transfers:
Check the Battery or Hydraulic Oil: Ensure the battery is fully charged or the hydraulic system has no leaks.
Confirm Legs Are Fully Expanded and Locked: Prevent the equipment from tipping over during transfer.
Inspect the Sling Condition: No damage, loose threads, odors, or deformation.
Clear the Transfer Path: Remove obstacles such as curled carpets, wires, and small stools.
Assess the User’s Condition: Is the user conscious? hoyer lift guide Free from acute pain? Within the weight capacity of the equipment?
⚠️ If the user complains of chest pain, dizziness, severe limb pain, or if a fracture is suspected, do not force the transfer. Contact medical staff first.
III. Standard 6-Step Operation Process
Regardless of the transfer scenario, the following 6-step process applies to most situations:
Step 1: Prepare the Target Location
Push the wheelchair, bed, or toilet to the designated position, fully lock all brakes, retract the footrests, and ensure stability.
Step 2: Position the Lift
Push the Hoyer Lift next to the user, fully expand the legs, and ensure all four points are grounded without wobbling.
Step 3: Put on the Sling
Gently assist the user to lie on their side.
Smoothly slide the sling under the user’s back (avoid dragging).
Adjust the leg straps to the middle of the thighs; do not press the back of the knees.
Fasten all connecting buckles and confirm the sling is flat without twisting.
Step 4: Connect and Pre-Lift
Hang the connecting loops on the sling to the lift’s hooks (usually 4-point or 6-point).
Start lifting slowly to raise the user about 10–15 cm off the supporting surface.
Pause and observe: Is the user sitting stably? Any discomfort?
Step 5: Transfer Smoothly
Rotate the boom at low speed, avoiding furniture and door frames.
Keep the boom vertical; do not pull obliquely or turn sharply.
Hover directly above the target position.
Step 6: Lower and Finish Up
Lower slowly to allow the user to sit or lie down gently.
Unfasten the sling, assist the user in adjusting clothing and covering with a blanket to restore privacy.
Fold the equipment and store it in place; if cleaning is needed, dry the sling before storing.
IV. Sling Selection Guide
The sling is the part that directly contacts the user’s body. hoyer lift guide Choosing the wrong type or size will seriously affect safety and comfort:
Full Body Sling: Suitable for users who cannot sit stably on their own, providing comprehensive support for the back, hips, and thighs.
Toileting Sling: Features an opening in the middle, allowing the user to use the toilet without removing pants.
Floor/Rescue Sling: Front-opening design, easy to slide under the user from the floor, used for emergency transfers after a fall.
Shower Sling: Made of quick-drying, mildew-resistant material, suitable for use in the bathroom.
Important Principle: The sling must be compatible with the brand of the Hoyer Lift main unit (e.g., Arjo slings are usually not suitable for non-Arjo main units), otherwise the connection may not be secure.
V. Common Issues and Solutions
Q: The equipment makes abnormal noises during lifting?A: Stop operation immediately, check if there is any foreign object jamming the guide rail, or contact after-sales for maintenance.
Q: The sling keeps slipping down?A: It may be that the size is too large or the leg straps are not pulled into place. Readjust or replace with a suitable size.
Q: The battery cannot be fully charged?A: Lead-acid batteries have a lifespan of about 1–2 years, hoyer lift guide and lithium batteries about 3–5 years. Consider replacing the battery.
Q: Unable to turn in a narrow bathroom?A: Choose a model with a narrow base or foldable legs; remove temporary obstacles such as trash cans and non-slip mats before transfer.
VI. Safety Rules to Keep in Mind
✅ Never Overload: The equipment’s load capacity ≥ user’s weight × 1.2.✅ Never Mix Non-Standard Slings: Only use slings compatible with the equipment.✅ Never Skip the Leg Expansion Step: Ensure legs are fully expanded and locked.✅ Never Operate High-Risk Transfers Alone: Such as transfers for obese, agitated users, or floor transfers.✅ Regular Maintenance: Replace the sling every 6–12 months; have the equipment professionally inspected once a year.
VII. Special Advice for Family Caregivers
Before using for the first time, watch the manufacturer’s operation video or ask a professional for on-site guidance.
Stick a simple flow chart next to the equipment for quick recall of steps in emergencies.
Communicate the transfer plan with the user to reduce their anxiety.
Record the equipment purchase date and sling replacement time, and establish a maintenance calendar.
Conclusion: Technology Empowers Love, Standards Safeguard Safety
The Hoyer Lift is not a cold machine, but an extension of caregiving love. It allows elderly parents to avoid shame when using the toilet, enables injured loved ones to suffer less on the road to recovery, and lets caregivers maintain health and hope while giving.
Mastering this guide is not just about learning a skill, but about fulfilling a responsibility—using the right way to support the daily life of your loved ones.