Category: Patient Lifts
Posted by 2026-01-09 13:01
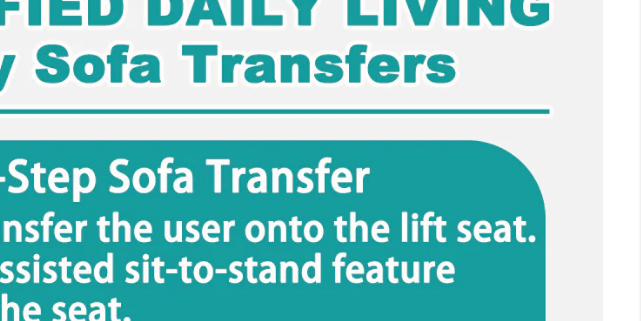
hoyer lift transfer to chair
Guide to Transferring Patients to a Chair Using a Hoyer Lift: Safe, Smooth, and Dignified Care Practices
Transferring patients with limited mobility from a bed to a chair is one of the most common yet critical tasks in daily care. For patients who are fully dependent on others for assistance, the lack of professional equipment support during this process not only reduces efficiency but also significantly increases the risk of back injuries to caregivers, as well as accidents like patient falls or skin tears. hoyer lift transfer to chair The Hoyer Lift is a core tool that provides a safe and reliable solution for such transfers.
However, owning the equipment does not guarantee safe transfers—every step, from path planning and sling selection to equipment positioning and lift control, requires rigorous execution. This article systematically explains the standard operating procedures, key precautions, and humanistic care essentials for safely transferring patients from a bed to a chair (including regular chairs, wheelchairs, or armchairs) using a Hoyer Lift. It aims to help caregivers ensure safety while maintaining the patient’s comfort and dignity.
I. Comprehensive Preparation Before Transfer
A successful transfer starts with thorough preparation. Never rush into the operation.
1. Assess the Patient’s Condition
Confirm the patient is conscious, emotionally stable, and able to follow simple instructions.
Check the integrity of the patient’s skin, especially for redness or damage on bony prominences.
Ask if the patient needs to use the toilet or adjust their position to avoid returning immediately after the transfer.
2. Select the Appropriate Sling
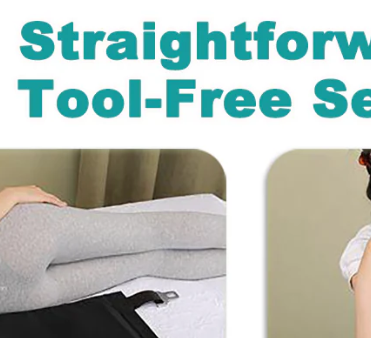
A standard full-body sling is suitable for most bed-to-chair transfers.
If the patient needs to sit in the chair for an extended period, a sling with back support can be used to enhance comfort.
Ensure the sling size matches the patient’s body type and is free from wear, mold, or split seams.
3. Inspect Equipment Functionality
Test whether the outriggers can extend and lock smoothly.
Confirm that electric models have sufficient battery power and manual models have normal hydraulic function.
Check that the wheels roll flexibly and the brakes work effectively.
Verify that the remote control or handle responds sensitively.
4. Clear the Transfer Path
Remove obstacles from the floor (such as wires, slippers, and stools).
Ensure the passage width from the bed to the chair is ≥ 90 cm.
If the target is a wheelchair, lock its brakes in advance and retract the footrests.
II. Proper Sling Placement: The Foundation of Safety
Incorrect sling placement is the primary cause of transfer accidents. Be sure to follow these steps:
Assist the patient to lie on their side (prioritize the stronger side), hoyer lift transfer to chair and slide the folded sling under their back.
Help the patient lie flat again, then pull the end of the sling out from under their legs.
Ensure the patient’s hips are fully seated in the bottom pocket of the sling—this is the core weight-bearing area.
Guide each leg into the respective leg loops; the loops should be positioned at the mid-thigh and never constrict the back of the knees.
Smooth out the fabric on the back to avoid wrinkles piling up on the shoulder blades or waist.
Confirm all lifting loops face upward and are free from twists.
Tip: For single-caregiver operation, ask the patient to slightly bend their knees or lift their hips to make it easier to slide the sling into place.
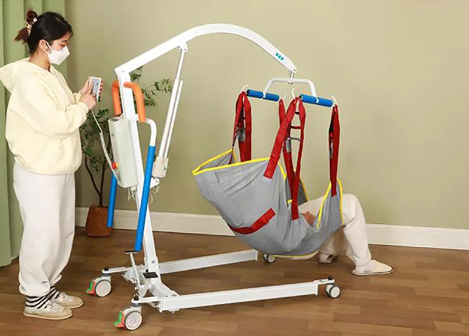
III. Equipment Positioning and Connection
Extend the Hoyer Lift’s outriggers and push the lift to the bedside, ensuring the base fully enters the space under the bed.
The outriggers must be fully extended and a "click" sound heard to confirm locking, preventing the equipment from tipping over during lifting.
Lower the lift arm to its lowest position and attach the sling’s lifting loops to the hooks.
Check each hook one by one to ensure they are closed—most hooks have a red indicator window, which should turn green or hide the red dot when closed.
Gently pull the sling to test if the connection is secure.
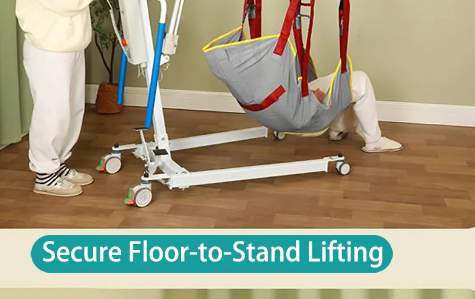
IV. Performing the Transfer: Emphasize Both Smoothness and Communication
Low-Level Test
First, lift the patient 5–10 cm and pause to observe:
Is the sling slipping?
Is the patient complaining of pain or discomfort?
Is the equipment tilting or making abnormal noises?
Slow Lifting
After confirming no abnormalities, continue lifting the patient smoothly until they are slightly higher than the chair seat.
Moving the Equipment
Release the brakes and slowly push the Hoyer Lift directly above the chair. Note:
Stand firmly, use leg strength to push the lift, and avoid bending over to drag it.
Keep the patient’s body centered to prevent collisions with doorframes or furniture.
Precise Alignment
Ensure the center of the lift arm aligns with the center of the chair seat to avoid tilting and potential tipping.
Controlled Lowering
Slowly lower the patient so their hips gently touch the chair surface. hoyer lift transfer to chair Never release suddenly!
For manual models: Slowly turn the release valve.
For electric models: Gently press the lower button, and use short, fine adjustments when approaching the chair surface.
Removing the Sling
First, unfasten the leg loops, then pull the sling out from behind the patient.
Move gently to avoid rubbing the patient’s skin.
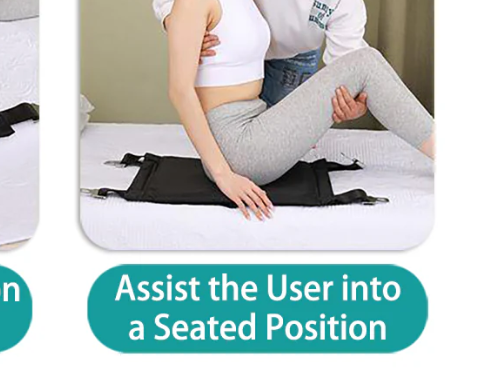
Straighten the patient’s clothing and adjust their sitting position for comfort.
V. Key Steps After Transfer
Check the stability of the patient’s sitting position: Are their feet flat on the floor? Is their back fully leaning against the chair? Add cushions if necessary.
Ask about their comfort: "Are you sitting comfortably? Is there any pressure anywhere?"
Clean and store the equipment: Clean or replace the sling according to regulations, and fold the Hoyer Lift for storage in a dry place.
Record the transfer details: Note the time, the patient’s reaction, and any abnormal events in the care log.
VI. Common Mistakes and Safety Warnings
Outriggers not fully extended or locked → The equipment may tip over during lifting.
Sling leg loops constricting the popliteal fossa (back of the knee) → May compress the common peroneal nerve, leading to foot drop.
Insufficient lifting height → The patient’s legs may drag on the floor during movement, causing scratches.
Lowering too quickly → Impact may cause coccyx pain or fractures.
Ignoring communication with the patient → Anxiety or sudden struggling may trigger accidents.
Remember: If you are unsure about anything or notice an abnormality, stop the operation immediately!
VII. Humanistic Care: Warmth Beyond Technology
Transfer is not just a physical action, but also an emotional interaction.
Explain before the operation: "We’re going to move to the chair in the living room. Please relax—I’ll hold you steady."
Maintain eye contact during the process and keep your tone calm.
Offer positive feedback after completion: "You cooperated really well!"
Respect the patient’s privacy and straighten their clothing promptly.
These details transform cold mechanical operations into warm care.
Conclusion: Every Transfer Is a Lift for Life
Using a Hoyer Lift to transfer patients from a bed to a chair may seem like a repetitive task, hoyer lift transfer to chair but it actually embodies professional judgment, technical proficiency, and humanistic care. It is not just about "moving someone over," but about conveying respect through safety and safeguarding dignity through smoothness.
When you operate in strict accordance with procedures, comfort the patient softly, and lift/lower them smoothly, you are doing far more than completing a transfer—you are building a care environment where the patient feels valued and protected.
Because true care never relies solely on strength, but on dedication. And the Hoyer Lift is the most reliable partner for this dedication.