Category: Patient Lifts
Posted by 2026-01-09 13:01
hoyer lift training checklist

Safe Transfers, Step by Step: Hoyer Lift Operation Training Checklist
In the medical and caregiving fields, the safe use of a Hoyer Lift is not just a skill, but a responsibility. hoyer lift training checklist Relying solely on memory and habitual operations makes it easy to overlook details and trigger risks. Solidifying the complete operational process into a systematic checklist is the cornerstone of ensuring every transfer is safe, comfortable, and error-free.
This checklist is designed to provide nurses, nursing assistants, and home caregivers with a clear action guide, suitable for training, assessment, and daily self-reminders.
Comprehensive Safety Operation Checklist for Hoyer Lifts
Phase 1: Pre-Operation Preparation – Laying the Foundation for Safety
Patient/User Assessment
Communication and Consent: I have explained the entire transfer process to the user in simple, clear language and obtained their cooperation and consent.
Physical and Mental Status Assessment: I have evaluated the user’s cognitive status (consciousness, cooperation level, presence of anxiety or resistance) and physical tolerance.
Skin and Body Check: I have quickly inspected the skin condition of the user’s back and weight-bearing areas to confirm no pressure sores, redness, or damage.
Weight Verification: I have confirmed the user’s weight is within the clearly marked maximum load capacity of the lift equipment.
Environmental Safety Assessment
Path Clearance: I have thoroughly cleared the transfer path from the starting point to the destination, removing wires, carpet edges, and all other obstacles.
Equipment Securement: I have confirmed the brakes of the hospital bed and wheelchair (or chair) are fully engaged, and performed a shake test to ensure stability.
Height Adjustment: I have adjusted the bed surface to the most suitable operating height (approximately at my waist level) to protect my lower back.
Space Confirmation: I have confirmed there is sufficient space for the lift’s outriggers to fully extend and move smoothly, including the space under the bed and wheelchair.
Equipment Selection and Inspection
Sling Selection: Based on the user’s physical condition and transfer purpose, I have selected the correct type (e.g., full-body, leg-and-back) and size of sling.
Six-Point Sling Safety Check: I have carefully inspected the sling to confirm it has: no wear, no tears, no loose stitching, no discoloration, all buckles intact, and all lifting loops free of cracks or deformation. If any item fails, I have immediately stopped use and replaced the sling.
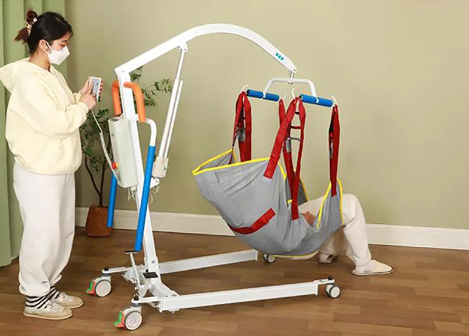
Lift Function Check: I have inspected the lift to ensure: outriggers are fully extended and locked, all casters roll smoothly, hoyer lift training checklist the manual hydraulic pump lifts and lowers smoothly without slipping, and the electric model has sufficient battery power. I have performed a no-load test to confirm normal functionality.
Phase 2: In-Operation Execution – Ensuring a Smooth Transfer
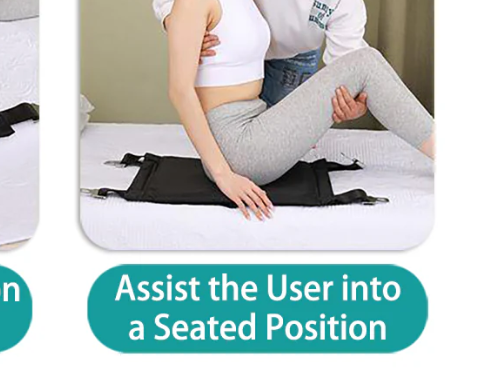
Proper Sling Placement
Safe Insertion: After assisting the user to lie on their side, I have slid the folded sling flat under the user’s back to the area beneath their hips, ensuring no wrinkles.
Flat Unfolding: After helping the user return to a supine position, I have pulled the sling out from the other side and fully unfolded it, ensuring it lies flat under the user.
Proper Wearing: I have correctly fastened the leg straps (if applicable) and adjusted them to a comfortable position, avoiding over-tightening.
Orientation Confirmation: I have confirmed the correct front-back orientation of the sling (following color or text markers).
Connection and Lifting
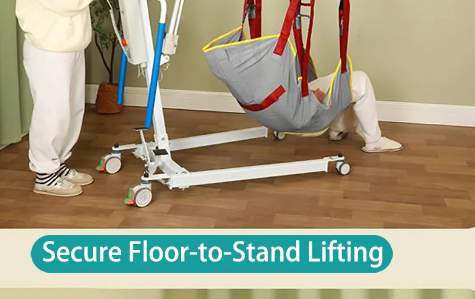
Lift Positioning: I have moved the lift smoothly over the bed, ensuring the outriggers safely extend under the bed and the hooks align with the center of the user’s body.
Secure Connection: I have firmly attached all lift hooks to the sling’s lifting loops and double-checked the connections.
Pre-Lift Check: After tightening the sling to make the user feel securely supported, I have performed a final safety check before fully lifting.
Smooth Lifting: I have lifted the user completely at a steady, hoyer lift training checklist slow speed, and maintained verbal communication throughout the process (e.g., “We are starting to lift now.”).
Mid-Air Pause: After the user is fully off the bed, I have paused briefly to confirm their posture in the air is stable and not tilted. If tilting was found, I have safely lowered the user and readjusted the sling.
Transfer and Lowering
Smooth Movement: I have moved the lift smoothly to a position directly above the target location (e.g., wheelchair), facing the user at all times during the process.
Precise Alignment: I have aligned the user’s body with the center of the wheelchair or chair seat.
Safe Lowering: I have safely lowered the user at a steady, slow speed, and maintained communication throughout (e.g., “We are starting to lower now.”).
Touchdown Confirmation: Before disconnecting the hooks, I have confirmed the user is fully and stably seated on the chair, with their back pressed firmly against the chair backrest.
Phase 3: Post-Operation Follow-Up – Completing the Closed-Loop Management
Disconnection and Equipment Removal
Safe Disconnection: After confirming the user’s weight is fully supported by the chair, I have disconnected all hook connections.
Path Clearing: I have moved the lift away to ensure it does not block any passageways.
Sling Handling: Based on subsequent plans (whether another transfer will be needed soon), I have assessed and decided whether to remove the sling immediately.
Equipment Organization and Documentation
Standard Storage: After use, I have stored the equipment in the designated area and secured the hooks.
Necessary Documentation: I have recorded the details of this transfer and noted any abnormal conditions (e.g., user discomfort, skin redness, unusual equipment noises).
Fault Reporting: If any equipment defects were found, I have immediately reported them and marked the equipment to ensure it is not used again.
Conclusion
This checklist is a silent yet rigorous safety supervisor by your side. hoyer lift training checklist Whether used for training new staff, self-inspection, or safety handovers among team members, consistent use will help internalize safe operating procedures into instinct. Remember, on the journey of safeguarding lives and dignity, no amount of careful checking is excessive.